How to Create a Custom Domain
Chip makes it quick and easy to create a fully branded online store via custom domains. When designed effectively, custom domains strengthen brand value, encourage repeat purchases, improve upselling, and ultimately increase sales.
Step 1: Navigate to the domain creation page
Sign in to your Chip account, click “Domains” and then click “Create Domain” to get started with domain creation.
Step 2: Fill out domain name details
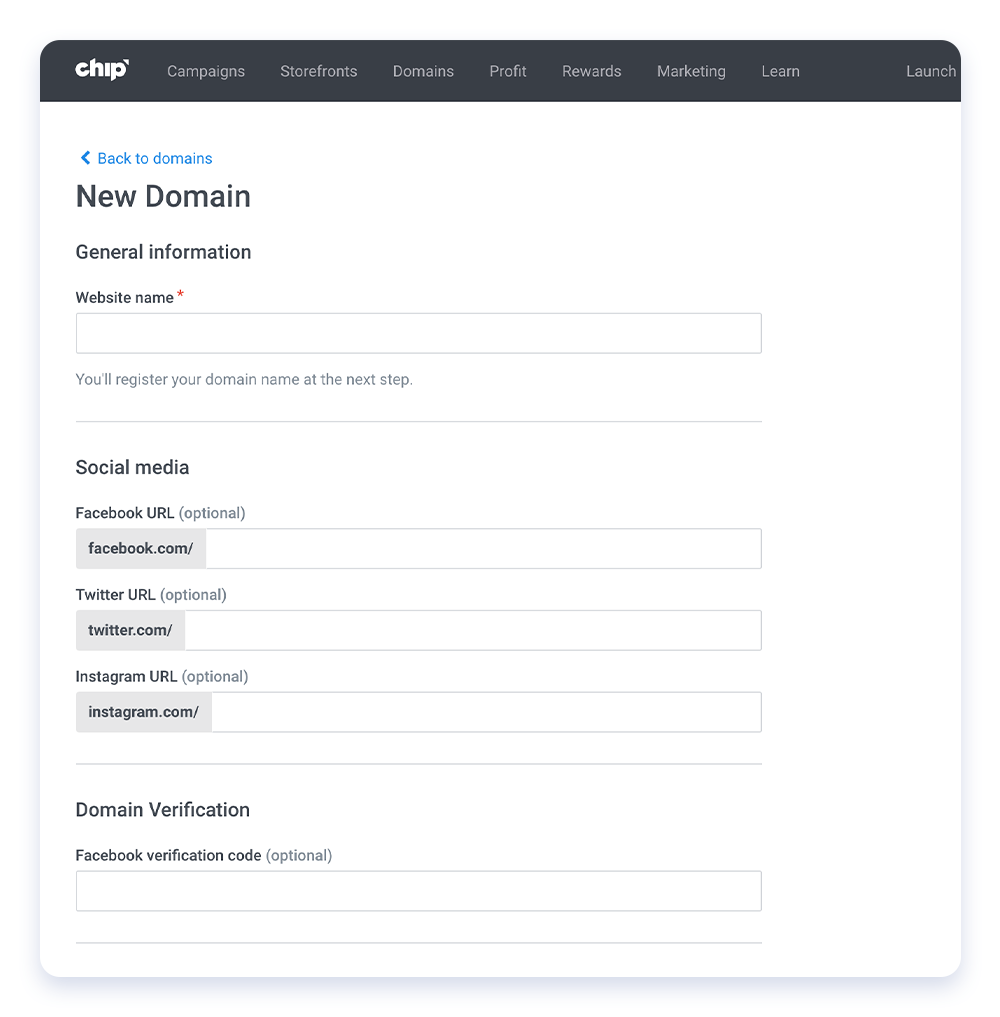
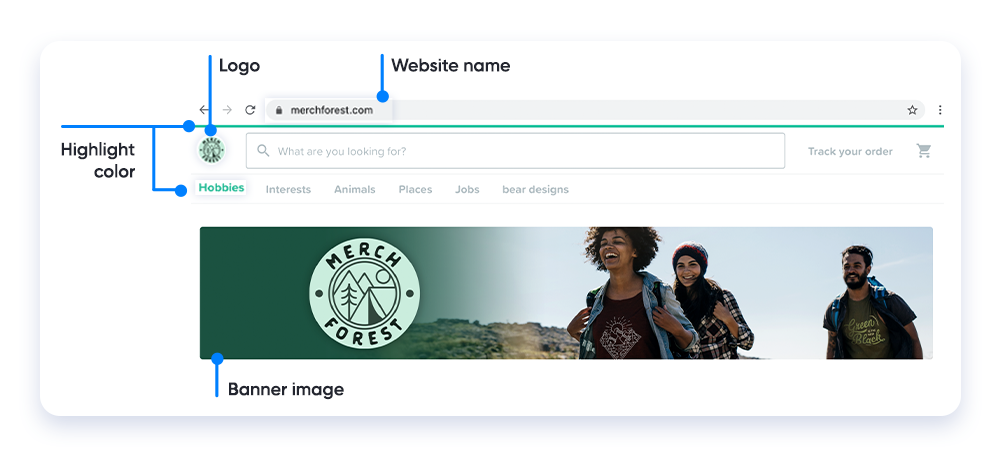
Once on the “New Domain” page, you must name your website, add social media links (optional), upload a homepage banner and logo, and choose a highlight color to complement your brand.
Step 3: Register your domain
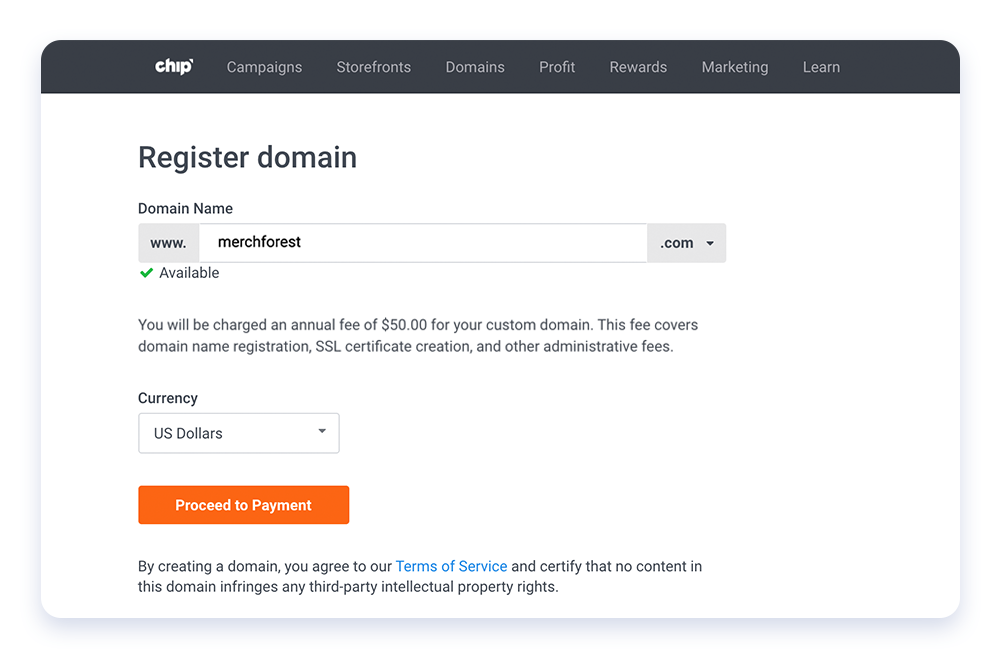
Click “Proceed to domain name registration” once domain details are complete. Enter your domain name below to check for availability—a green checkmark will appear to confirm.
To complete registration of your custom domain, you will be charged an all-inclusive annual fee of $50. This fee covers domain name registration, SSL certificate creation, and other administrative fees.
Before entering payment, select your desired currency from our six options:
- USD
- BDT
- EURO
- INR
- PKR
- VND
Click “Proceed to Payment” to finish the process. Most domains will be ready in roughly three hours, but some will require up to 24 hours.
Step 4: Fill your custom domain with new campaigns
Want to add campaigns to your domain? You’ll need to create new campaigns and assign them to your domain. On the last step of campaign creation, click the drop-down list under “URL” and select the appropriate custom domain URL.
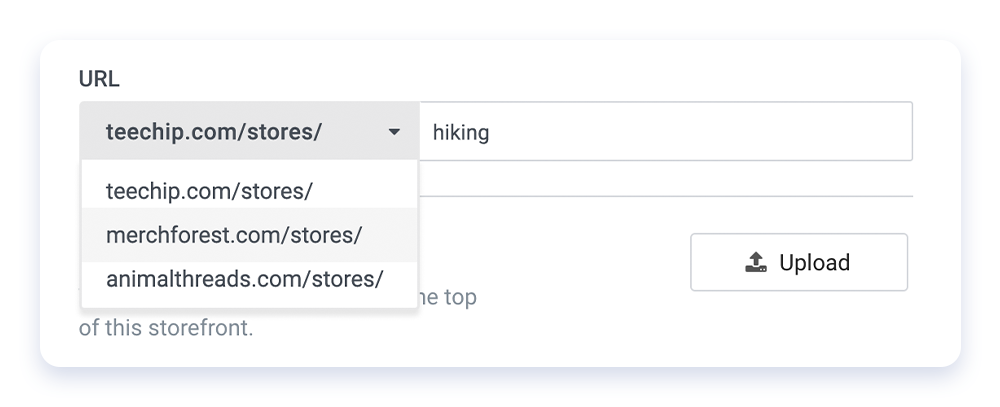
Select the correct domain URL for your new campaigns.
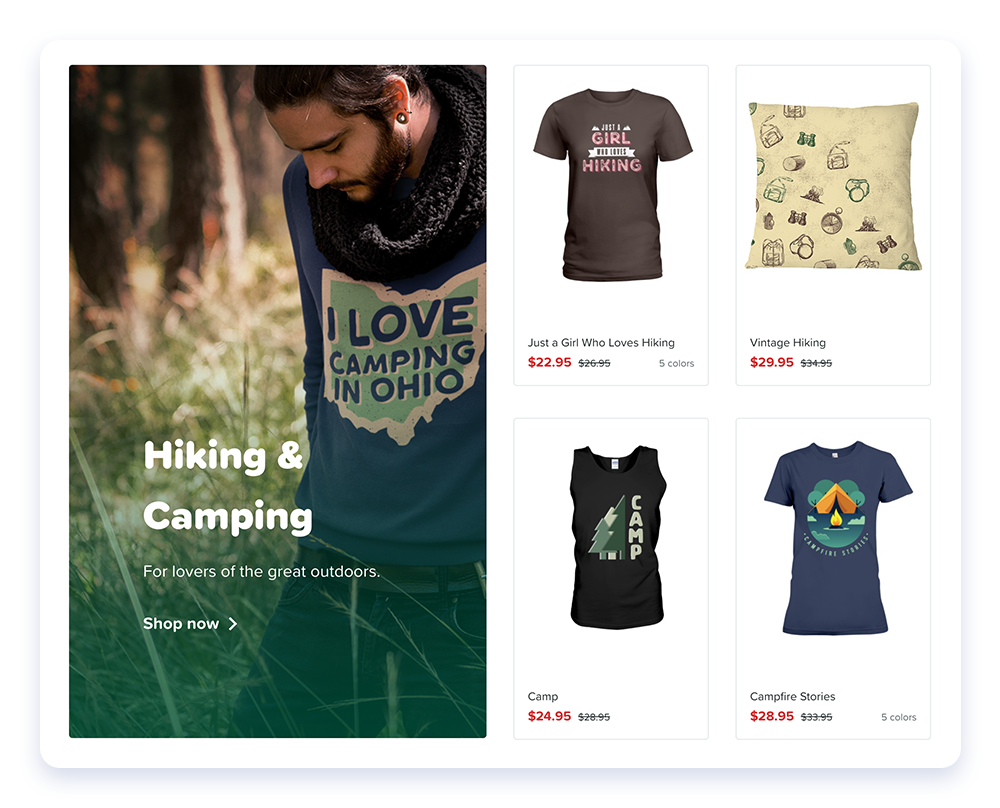
Step 5: Add collections to improve site navigation
Collections are found on your custom domain homepage and they feature your storefronts. Collections highlight up to four of your campaigns and display one banner image with custom text. Click the toggle button next to “Collection 1” to activate a collection.
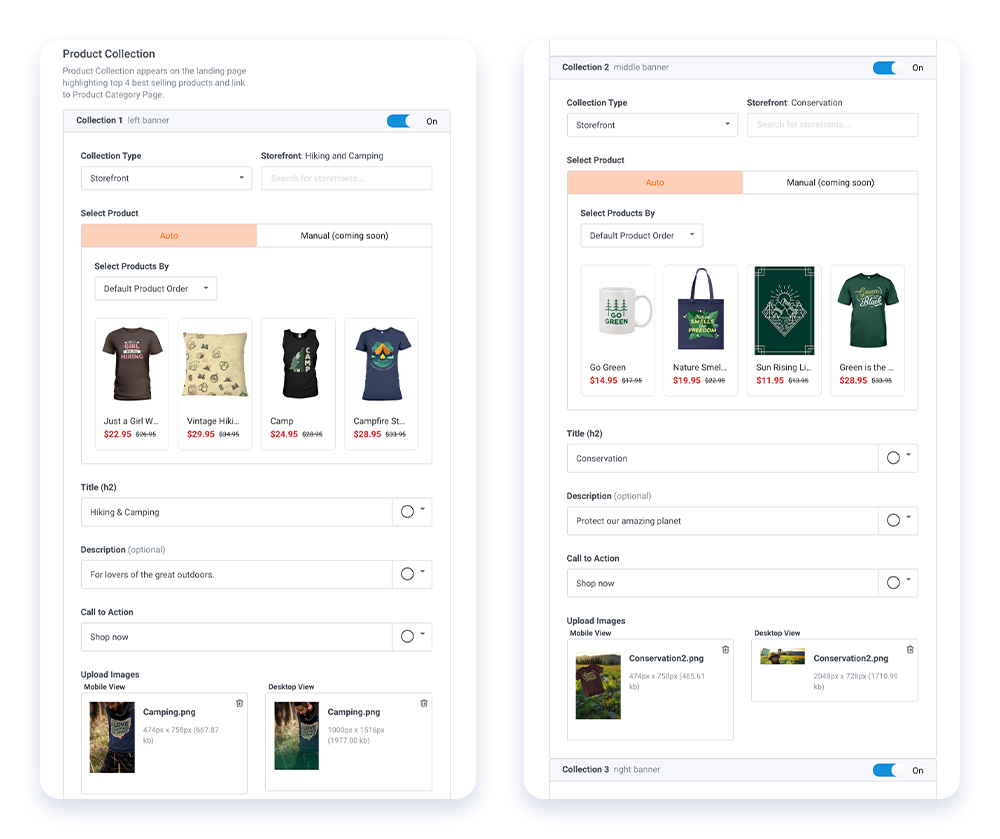
Step 6: Fill out your collection details
First, assign a storefront to your collection. Next, add a title, description, and a call-to-action in the font color of your choosing. Finally, add your banner images — we allow separate desktop and mobile banners for better optimization and higher conversions. Click “Save Changes” to publish your store.
Custom Domain Graphics Library
Access ready-to-use banner images, collections images, and logos to elevate your custom domain and turn it into a professionally designed online store. Visit the Custom Domain Graphics Library to download the graphics and design your custom domain.
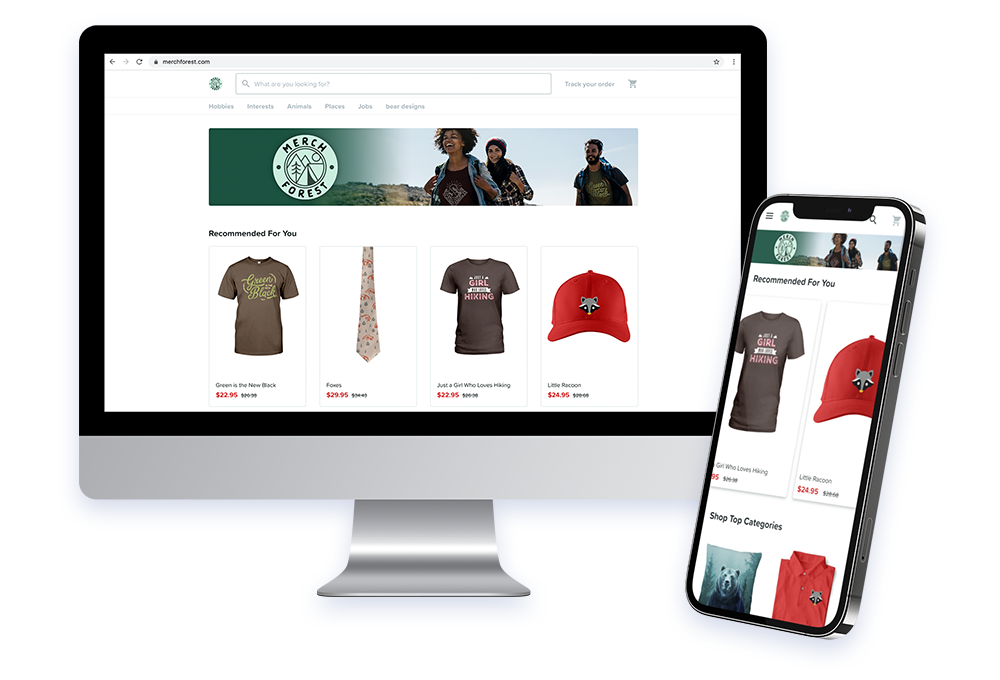
There you have it! In just six simple steps, your custom domain is officially ready for business. To see a real custom domain in action, check out MerchForest.com.