How to Use Customily on Chip

From birthdays to Christmas, the occasions to deliver a good present are endless, and finding an extra special gift can be stressful. At Chip, we focus on giving you the best tools and features to help you grow your business, and this time we partnered up with the best on the market for customizing products: Customily. Help your customers create unique and thoughtful gifts by learning how to use our new integration in your store and watch your sales numbers soar!
Through our close relationship with Customily, we’re proud to bring you a comprehensive set of personalization functionality, comprising the following:
- Personalized text, including rotated and curved text
- Placeholder (buyer-uploaded) images
- Dynamic images (image libraries you provide for buyer personalization)
Chip Personalized Text remains a supported Chip product.
Chip x Customily for Buyers
64% of Americans are willing to spend more on personalized gifts, especially in the categories concerning home décor and clothing. And this percentage goes up to 70% when it comes to millennials. Also, according to Business Wire, the global personalized gifts market reached $31.63 billion by 2021, an opportunity that you don’t want to miss!
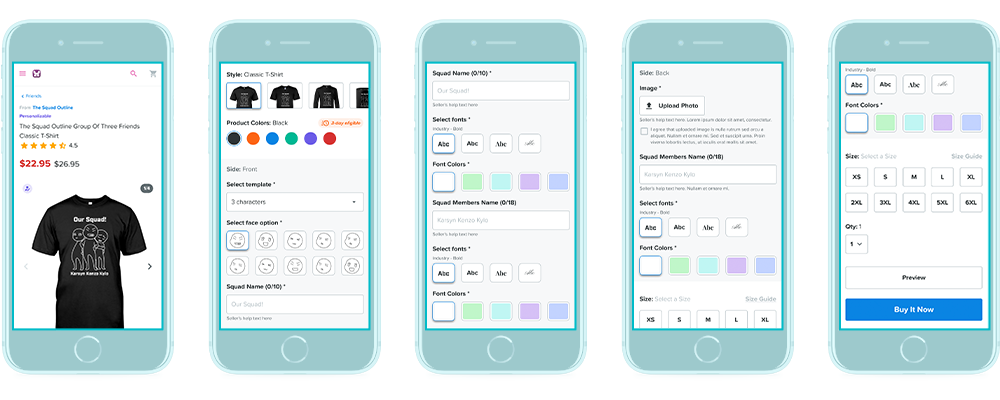
Your customers will be delighted to see the option sets they have to personalize your designs. With Customily, they can customize so much more than personalized text. They will be able to change details like hair color, skin color, facial expressions, or even add their own images. This will expand the alternatives of designs you can create for them significantly; the possibilities are endless!
Terms to Know
Template: What you will use to create designs in Customily via Chip.
Options set: Options selected by you to set up the different options the buyer will have available to choose from, such as personalized text, image upload, and artwork customization. Learn more about creating option sets here.
Getting Started
To help guide you through the product creation process with Customily, we created a special Chip x Customily playbook that solves most of the questions that may arise when starting your journey with our new personalization experience.
The first thing you’ll need to do to use Customily on Chip is create a Customily account. If you already have a Customily account, you’ll need to create a new one to use with Chip, as we’ve worked with Customily to deeply integrate with their system, and the associated capabilities needed for the Chip x Customily experience are only available on special Chip-specific Customily accounts.
- To create this Customily account, submit the form on this unique Chip x Customily signup page. For the Ecommerce Url field, use any custom domain (CD) associated with your Chip account. If you don’t have a CD, you can use any domain not already taken by another Customily user--it doesn’t need to be a real URL, as long as it’s unique to Customily. The field isn’t used by the Chip x Customily integration, but Customily still requires it.
- For the Company Name field, use whatever name you’d like to refer to your entity as; e.g., it can simply be the name you used for your CD. Follow the onscreen instructions for the remaining fields.
- Once you’ve submitted this form, we’ll still need to approve the account. We should be able to do so within 24 business hours. You’ll receive an introductory email from Customily once the account is approved.
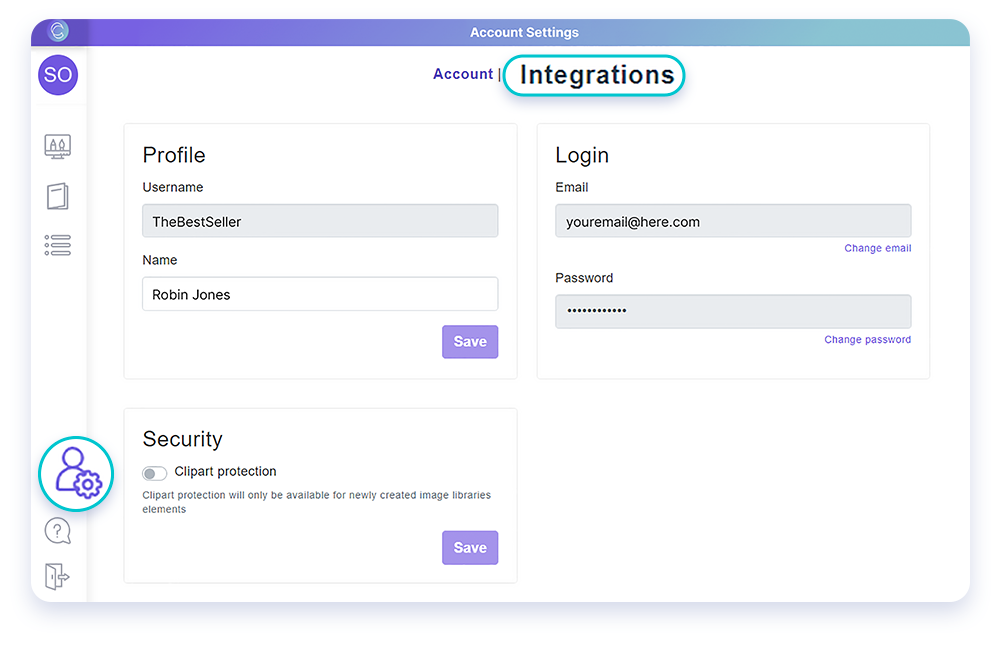
- The next thing you’ll need to do is sign into your Customily account and find the account’s API key under Account in the left-side navigation menu, click on the Integrations tab.
5. To see the API key, click the Show button and reenter your password.
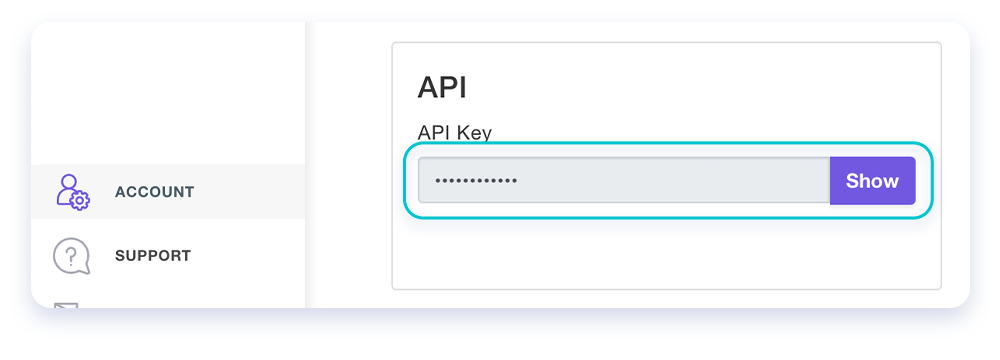
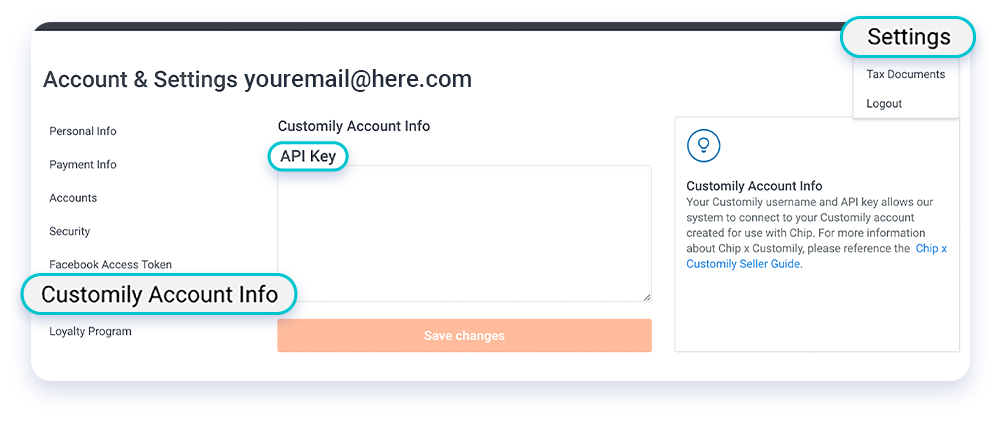
6. After that, you’ll need to copy and paste the displayed API key into the Customily API Key field in your Chip account. You can find this field in your Chip account under Settings (in the top-right dropdown navigation menu) -> Customily Account Info (in the left-side navigation menu.
Creating Chip x Customily Campaigns
- To use Customily on Chip, create a campaign like you normally would.
- When you get to selecting products, choose the tab Design with Customily.
- Select your products and add colors before continuing. Note that you will not be able to add more products or colors after this step. When you’re done, click I’ve finished selecting colors and products.
- Click Create template and option set for Chip to generate these items for the product side on Customily.
- Click on the template link, which will take you to the Customily platform.
- Add your design on Customily, then click Next.
- Once you’re back in Chip, click Sync design with Customily for your design to appear on the product.
- Update your option set by clicking on the link.
- Once that is completed, your design is ready for both Chip and Customily! For products with multiple sides, repeat steps 1-8 for each side.
Note that you can’t create a campaign with both Chip and Customily designs at this time. If you toggle between Design with Chip and Design with Customily, any selected products will be deselected, and any campaign configurations (including designs) will be reset.
Moreover, if you have any issue related to Customily, you can look into the Customily Help Center for answers or reach out to Customily directly for help. Please, feel free to contact us (support@chipchip.com) if these channels don’t help.
Recommendations
This section contains a list of Customily campaign creation [strong] recommendations. Following these recommendations will help ensure a positive personalization experience for you and your buyers.
- Don’t use the + New Option Set or + New Option Set From Template buttons to create option sets under Manage Options -> Option Sets in Customily. Only use Chip to create option sets. Any option sets created in Customily won’t be associated with anything in Chip.
- You can’t remove template / option set pairs from Chip or Customily at this time. To keep your campaigns and Customily account clean, only create template / option set pairs for those product sides you want a design on.
- To prevent fulfillment issues, follow the following:
- Observe the same requirements when designing with Chip, including the following. We’re working with Customily to validate these in Customily, so you won’t need to remember.
- For any image you upload:
- Minimum DPI of 150
- Only use images of file type PNG, except for vector images (all vector file types are currently supported)
- Minimum character size of 12pt for template "Text Box" and "Curved Text"
- For any image you upload:
- Observe the same requirements when designing with Chip, including the following. We’re working with Customily to validate these in Customily, so you won’t need to remember.
- Keep your designs inside the printable areas of the supported products.
- If you choose to upload your own fonts, ensure they don’t infringe any third-party intellectual property rights (the same rule you follow today for designs).
- Confirm that each of your Customily templates has at least one customization (a change you’ve made). To do so via Chip, click the Sync design with Customily button in the design step. A red exclamation point icon beside Edit template on this step means that the template either hasn’t been synced yet or doesn’t yet have customization. If a template doesn’t have the customization you’ve made, you’ll be selling a product without a design on a product side you’ve created a template for / indicated to Chip that you want a design on. We’ll disable the Continue button on the design step in this case in a future phase.
- After you’ve created a Customily campaign, check the campaign’s buy page for any issues.
Important notes
Create a nice set at home, take some products you own that are also included in your store, and take pictures o
All notes are about Customily campaign creation unless otherwise noted.
- In order to see the template when you click on its link, you need to be signed in to your Customily account. The reason why you have to search for the option set vs. being able to click on a link to view it is because Customily doesn’t support linking to option sets at this time (feel free to tell them you’d like to see them develop this functionality--we’re asking them to do so, too!).
- If you add a font, you’ll also need to add its option set swatch image. We’ll be developing the ability for you to create the option set from a template in a future phase, at which time you’ll no longer need to add the font swatch image yourself.
- If you’ve synced a template/option set pair and then refresh the browser page on the design step, the pair will become unsynced, and the default mockup will appear without your Customily design.
- We’ll be addressing the following limitations in future phases:
- You won’t see product thumbnails on the pricing page.
- You won’t be able to add additional products or colors after creating the campaign. This button will be hidden.
- Upsell support
- Duplicate and Bulk Duplicate support
- Support for additional product types
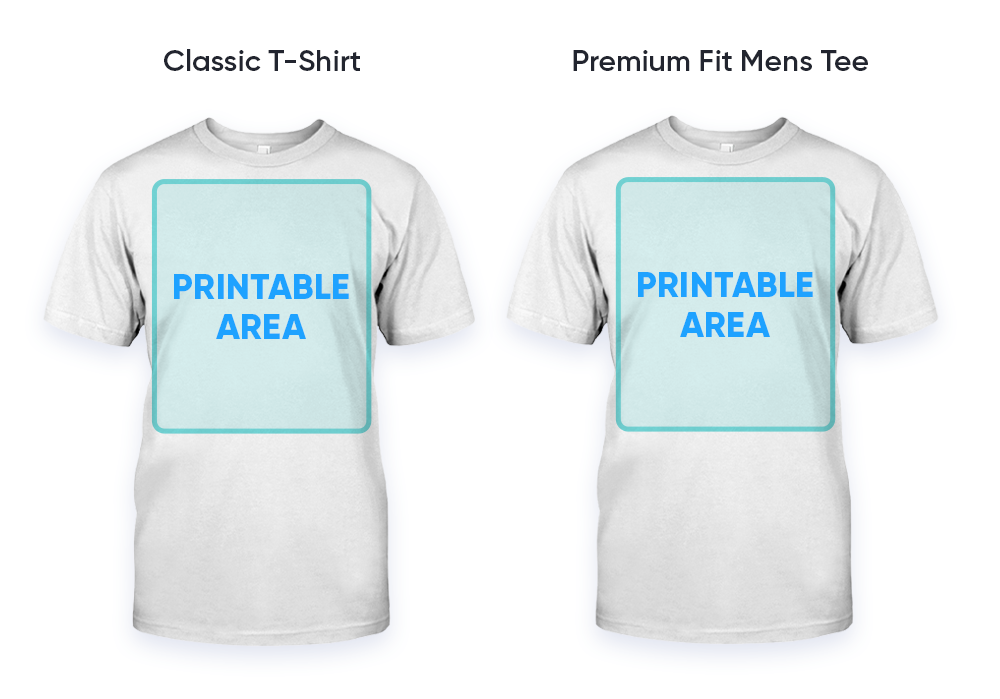
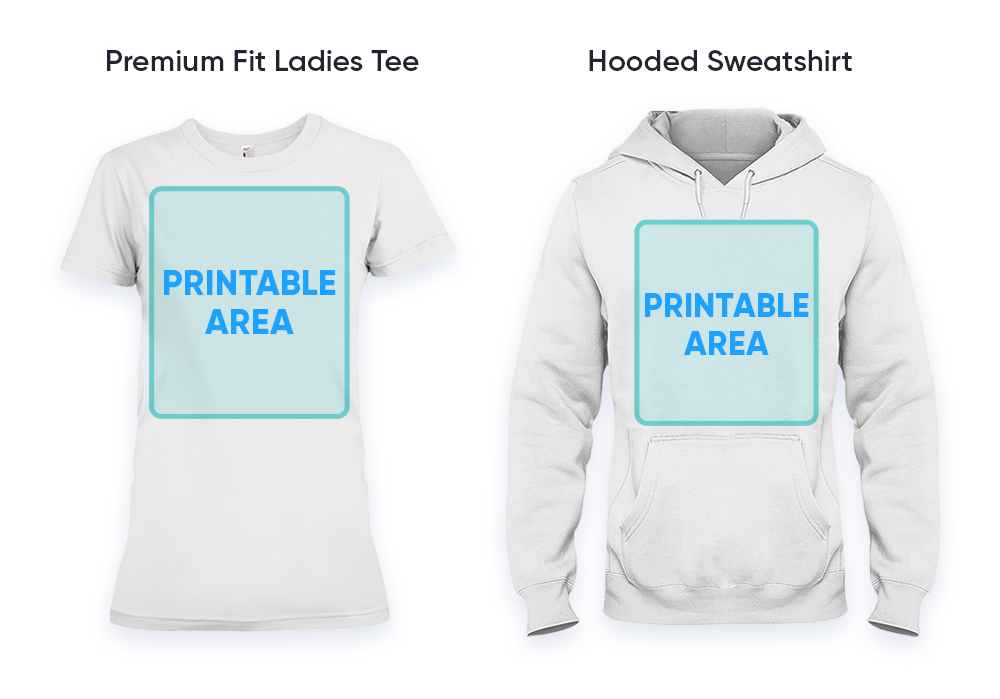
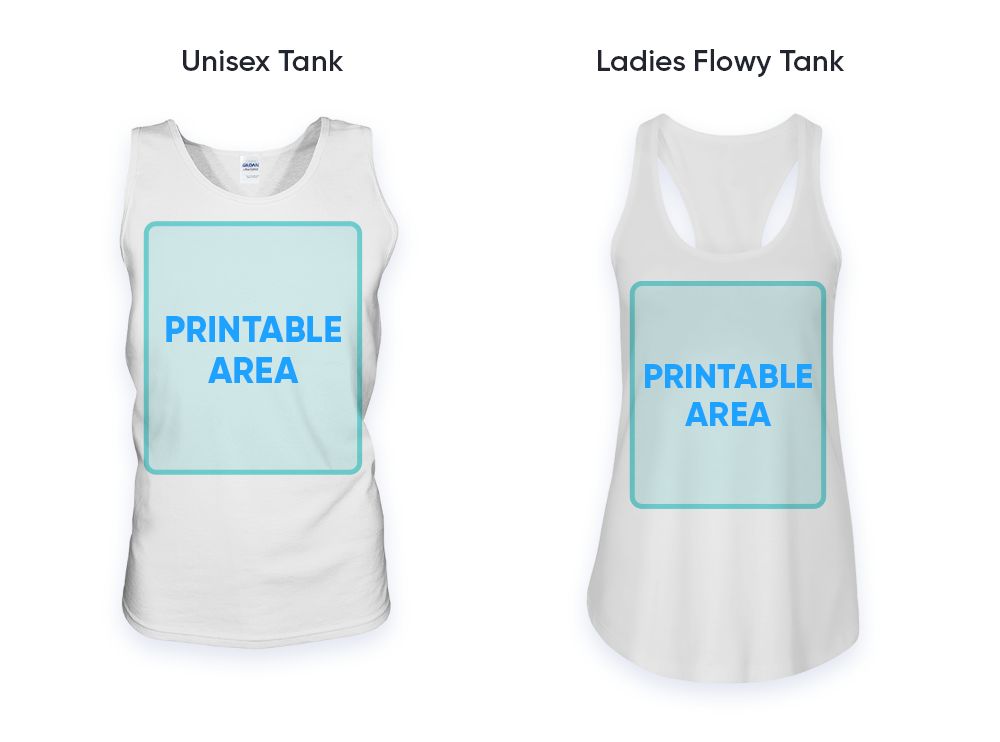
Printable areas
Reference the images below for the printable areas of the supported products for Customily campaigns. Ensure your Customily previews don’t show any design beyond the printable area.
- Classic T-Shirt & Premium Fit Men's Tee
- Premium Fit Ladies Tee & Hooded Sweatshirt
- Ladies T-Shirt & V-Neck T-Shirt

- Unisex Tank & Ladies Flowy Tank
There’s no denying that customized products can make great gifts and that people like to buy something that is unique. Are you ready to grow your sales to new levels with Chip x Customily?