How to Install the Facebook Pixel on Chip
The Facebook Pixel helps you track visitors and sales that come from your Facebook ads. According to Facebook for Business, the pixel performs three of the following:
- Build Custom Audiences from your website for remarketing
- Optimize ads for conversions
- Track conversions and attributing them back to your ads
Create a Facebook pixel
- Go to Events Manager and click on Connect Data Sources and select Web.
- Select Facebook Pixel and click Connect.
- Enter a name for your Pixel and click on Continue.
Once you've created your pixel, you're ready to add the Facebook pixel code to your Chip account.
Note: Per the new Facebook Conversion API, sellers will need to configure the Event ID parameter for every Facebook pixel. Head to the Event Details Parameters page in your Business Manager and select “Event ID” under parameters you want to set for this event.
How to integrate your pixel ID with all campaigns
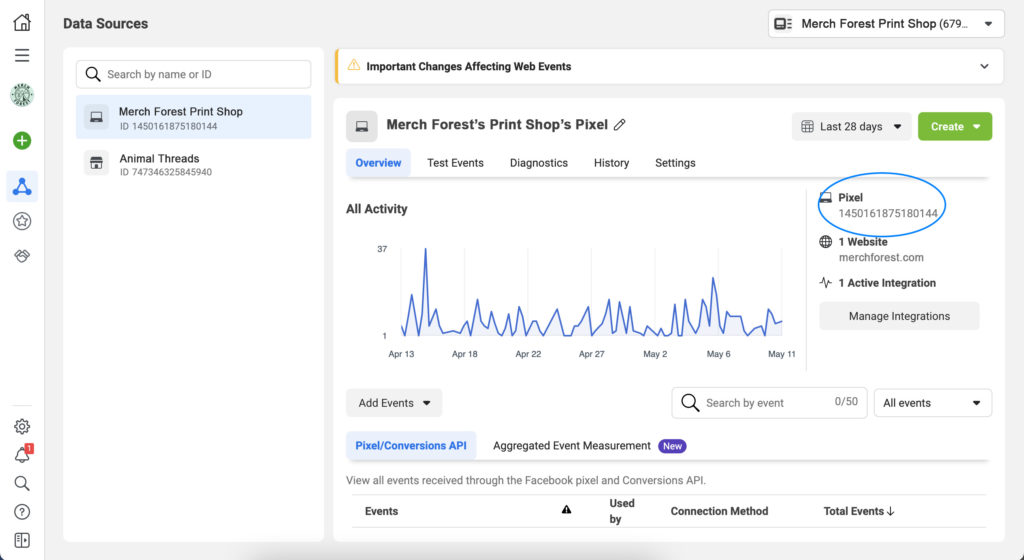
Step 1: Locate your pixel ID on the right-hand column in the Events Manager section on the Business Manager.
Step 2: Log in to your Chip account > Domains > Details > Settings and insert your pixel ID into the corresponding box.
How to assign a pixel ID for individual campaigns
You can always override the default analytics setting for individual campaigns.
For Dropship
Step 1: Click on the product you want to add the Facebook pixel to in the “Dropship” dashboard.
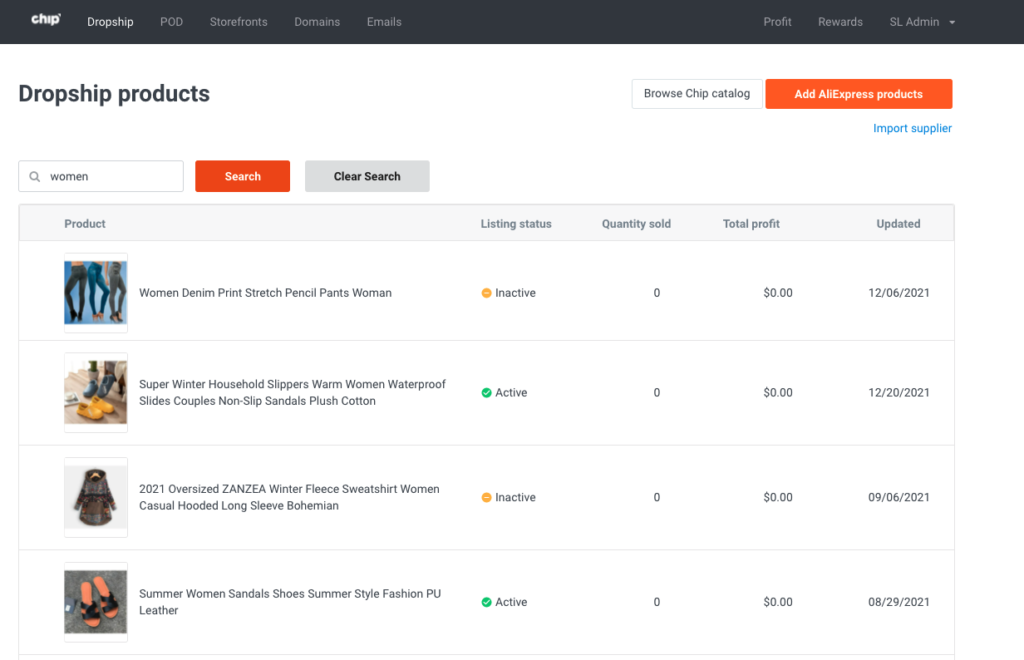
Step 2: Insert the Facebook Pixel ID in the box titled “Facebook pixel” located on the right side under “Listings”.
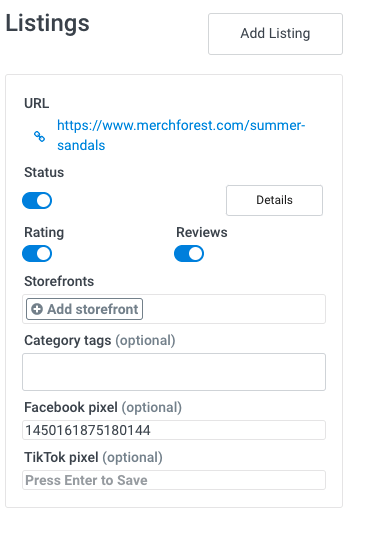
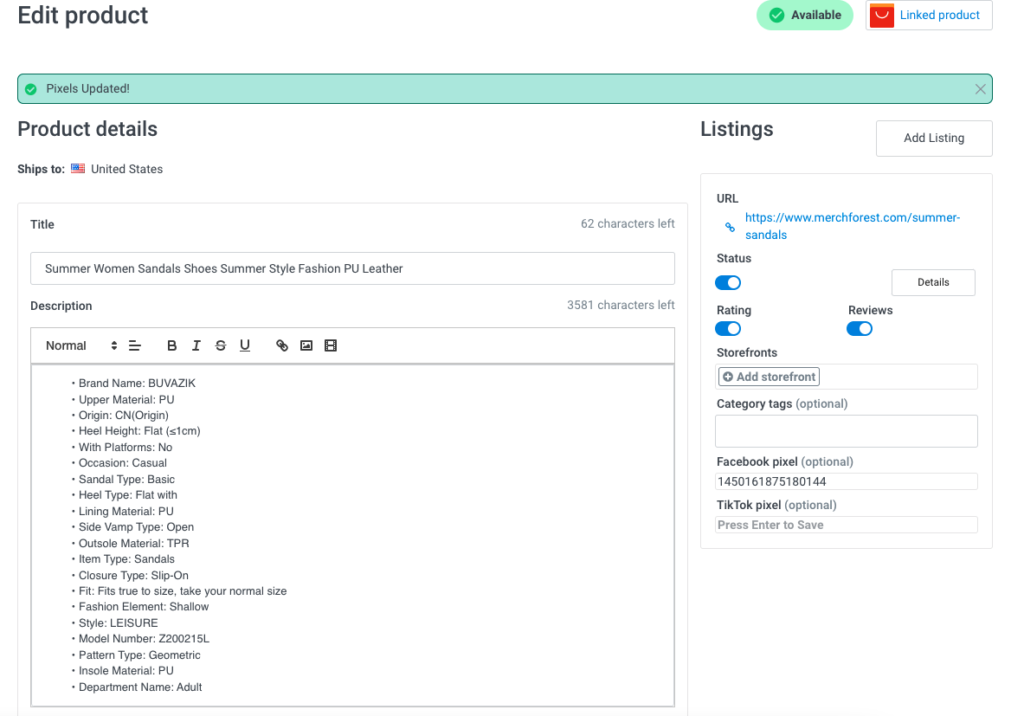
Step 3: Press enter to save, and a “Pixels Updated!” green banner will tell you it’s done.
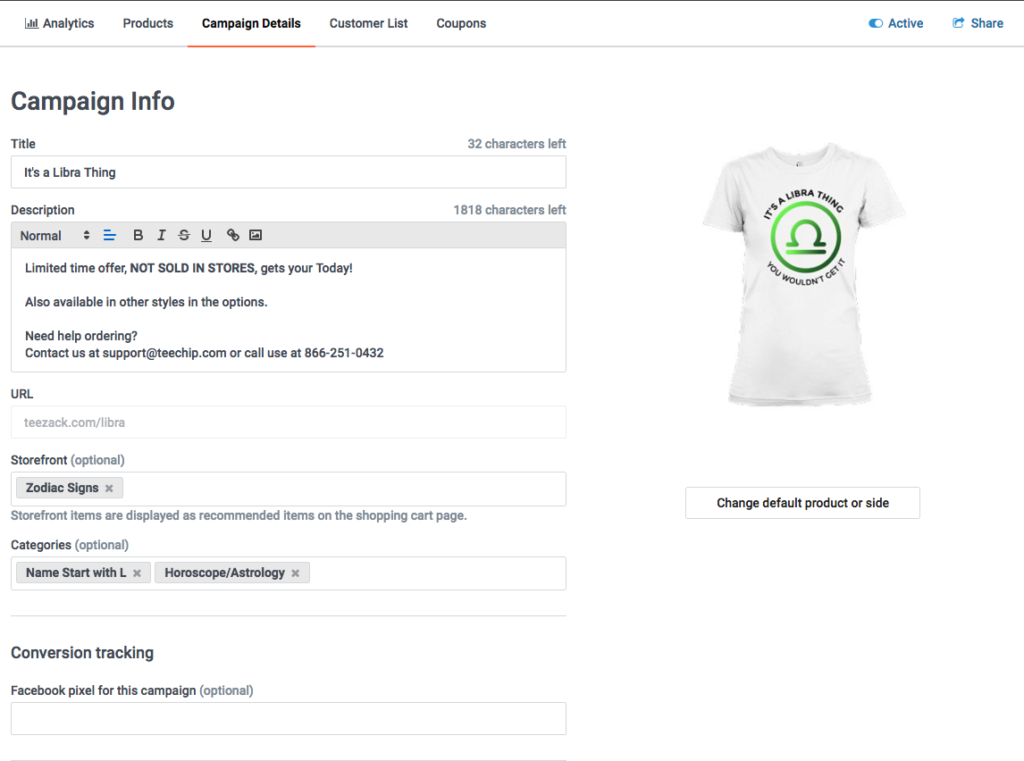
For POD
Step 1: Click on “Details” next to the desired campaign in the “Campaigns” dashboard.
Step 2: Then insert the Facebook Pixel ID in the box titled “Conversion Tracking” on the “Campaign Details” tab.
Congratulations! You’ve successfully implemented your Facebook Pixel into your Chip account.
How the Facebook Pixel can boost your success on Chip
- Track people who visited your campaign page but didn’t buy. You can create another ad for this group of potential customers. Many customers need to see a product more than once before making a purchase.
- Facebook’s algorithm can track people who make a purchase after seeing your ad. It then analyzes your customers’ profile to find similar users and then serves your ad to these new users, effectively optimizing your conversions.
- The new Facebook Pixel tracks eight different events during a conversion. Chip currently supports page view, add to cart, initiate checkout, and purchase. Once you know where your conversions are coming from, you can better decide which ads are performing best and scale-up.
- You can manage multiple pixels on Chip in the Pixel helper add-on menu. Once properly inputted, the two Pixel IDs will be fully supported for the product list page, campaign buyer page, shopping cart, checkout, and order confirmation.