How to Set up Product Personalization
Chip always strives to make it simple and easy for sellers to expand their offerings. Our product personalization tool allows you to give customers the chance to add a splash of creativity and uniqueness to the products they’re purchasing.
Still not getting it? No worries! Check out our step-by-step product personalization guide for more helpful information.
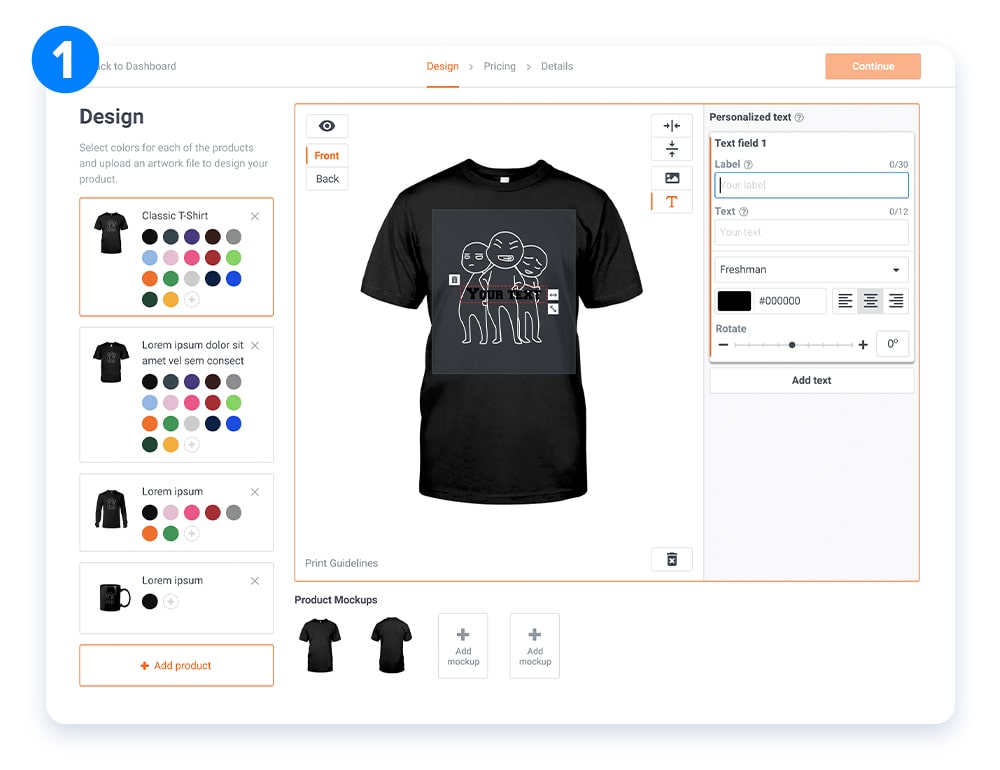
Step 1: Choose product and artwork
Begin by selecting products you’d like to offer as well as uploading the necessary artwork. Next, select the “T” icon to create a text box with label and text fields.
Important note:
- A maximum of five text fields can be added per printable side.
- Legging and embroidery products currently do not support personalization.
- Cut & sew hoodies currently only support front and backside printing.
- Previously created campaigns currently do not support personalization.

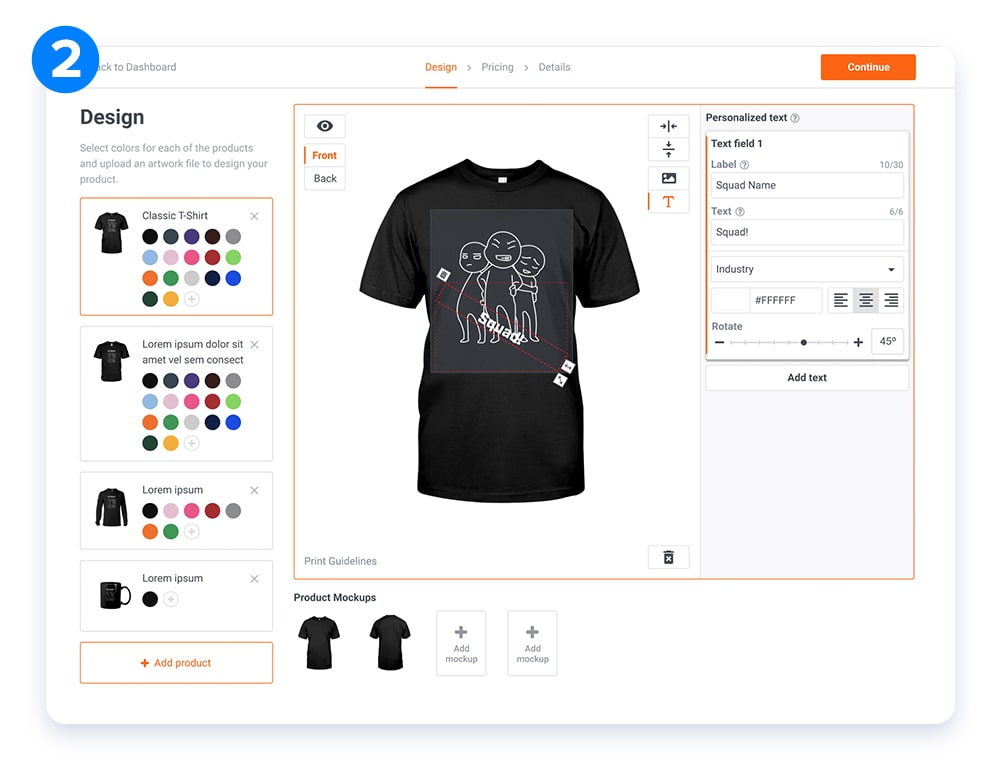
Step 2: Style the personalized text
Next, position and size the personalizable text box on your products. Keep in mind that the size and height of your text box will determine your maximum character limit. Also, you don’t have to worry about calculating the number of characters your customers can input; we will take care of that.
Now, get creative with your text! You now have the option to rotate your text a full 360 degrees. This expands your design ability even more with cool text placement in all directions. As always, make sure every letter of your rotated text still sits inside the artwork guidelines for the most accurate and best-looking final product.
Then, give your customers stylish typography to personalize their products. We have tons of creative fonts you can choose from, as well as several text colors and different text alignments.

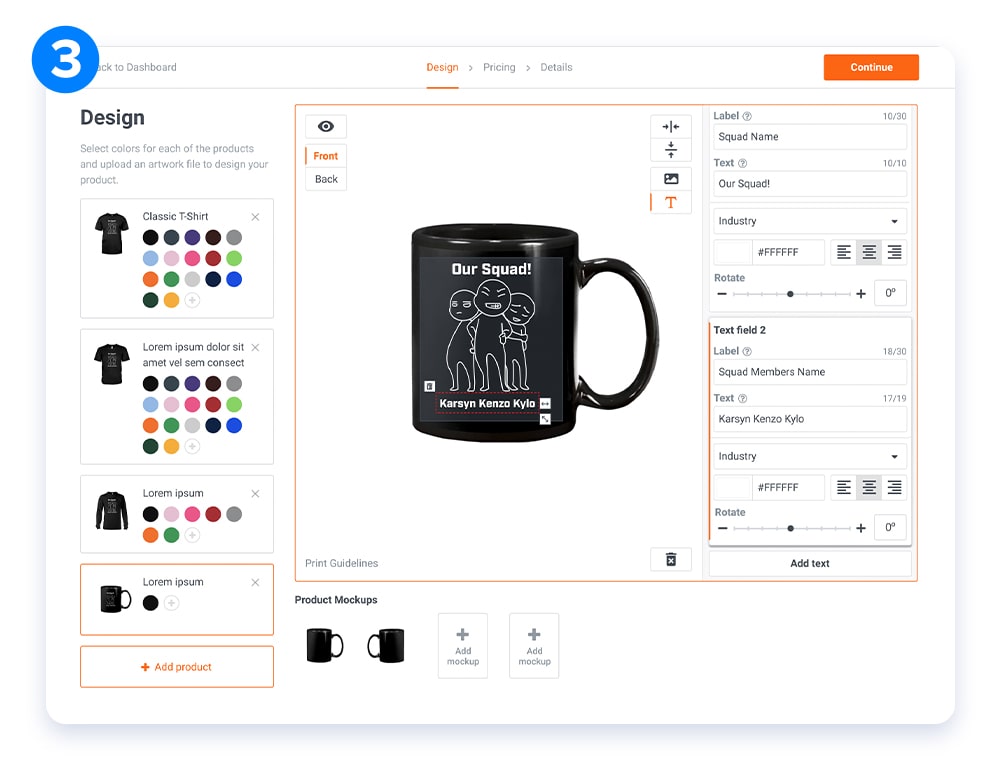
Step 3: Check other print types
The last step is to make sure your personalized design and text were added correctly. If you see a warning icon on one of your products, it means it’s a different print type product size. Therefore, you need to repeat step #2 with those items.

All done! Your shop is now up and running with personalized products ready for customers to leave their personal mark on.
