Coloring (or in this case, designing) inside the lines has been a print-on-demand industry standard for some time now. While it remains a solid option for showcasing your creative talent, amplifying your brand, or making a statement, you’re still limited to thinking inside the “print area” box. But not with cut and sew printing!
Before you go all-in on cut and sew printing, it’s important to fully understand the differences between cut and sew, all-over printing, and direct-to-garment (DTG) printing. Each process has its benefits but also some limitations that you need to be aware of.
DTG printing has been the standard for a while but it limits your design to a specific section on the garment. This is not the case with all-over-prints.
As suggested by the name, all-over printing allows you to expand your design across the entire garment. Cut and sew printing falls into the all-over-print category; however, cut and sew garments are assembled only after your design is printed on the fabric. With all-over printing, the entire design is printed on an already assembled blank garment.
Design Guidelines
We’ve added guiding lines directly to the design tool to help create a final product that prints flawlessly.
Blue line: Safe area – Components contained in this area are guaranteed to print.
Yellow line: Actual product size – Use this line to gauge the proportions of your design.
Red line: Print area – This extra margin accommodates any slight printer adjustments. Designs will likely disappear here but covering this area will help ensure a seamless final product.
Failing to abide by these guidelines can result in less-than-ideal products. Here’s a look at good versus bad artwork positioning:
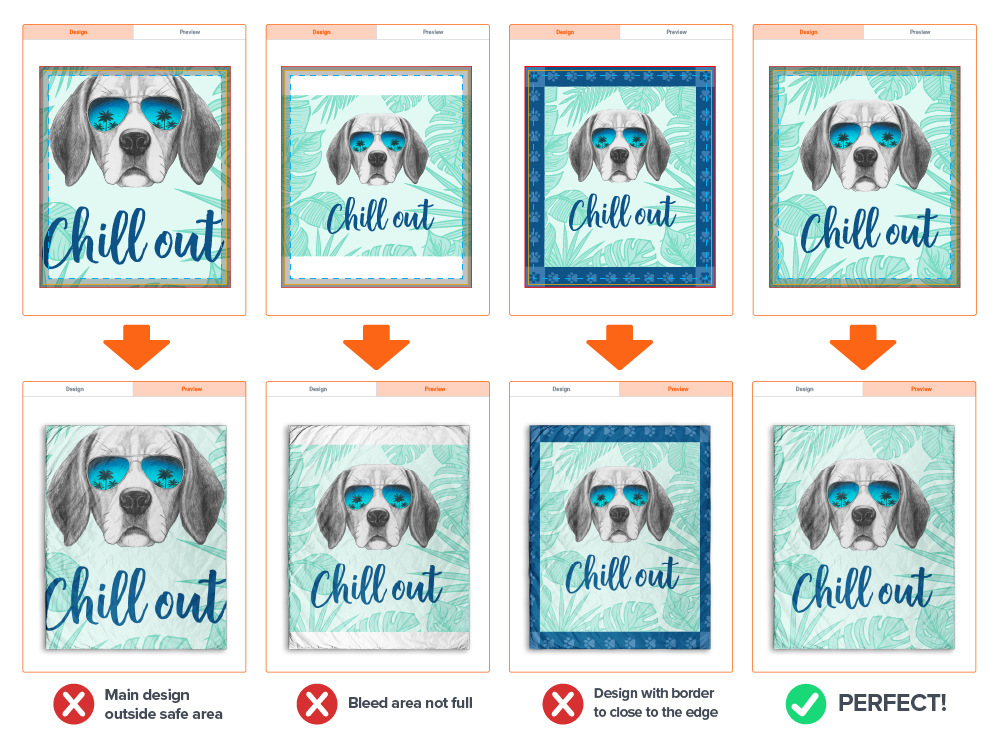
To ensure customer satisfaction, campaigns that fail to cover up the print area or have important design elements outside of the safe area will be taken down.
Pro Tips
- Keep your main design within the safe area.
- Fill up the print area with the background design.
- Avoid designs with borders too close to the cut-and-sew edge.
- Submit only PNG files at a 100 DPI minimum to ensure your art file is accepted.